English
 Arabic
 French
 Spanish
 Portuguese
 Deutsch
 Turkish
 Dutch
 Italiano
 Russian
 Romaian
 Portuguese (Brazil)
 Greek
Digitalization and Smart Grid Innovations Strengthen Super Grids Market Outlook
Health |
2026-10-27 06:09:44
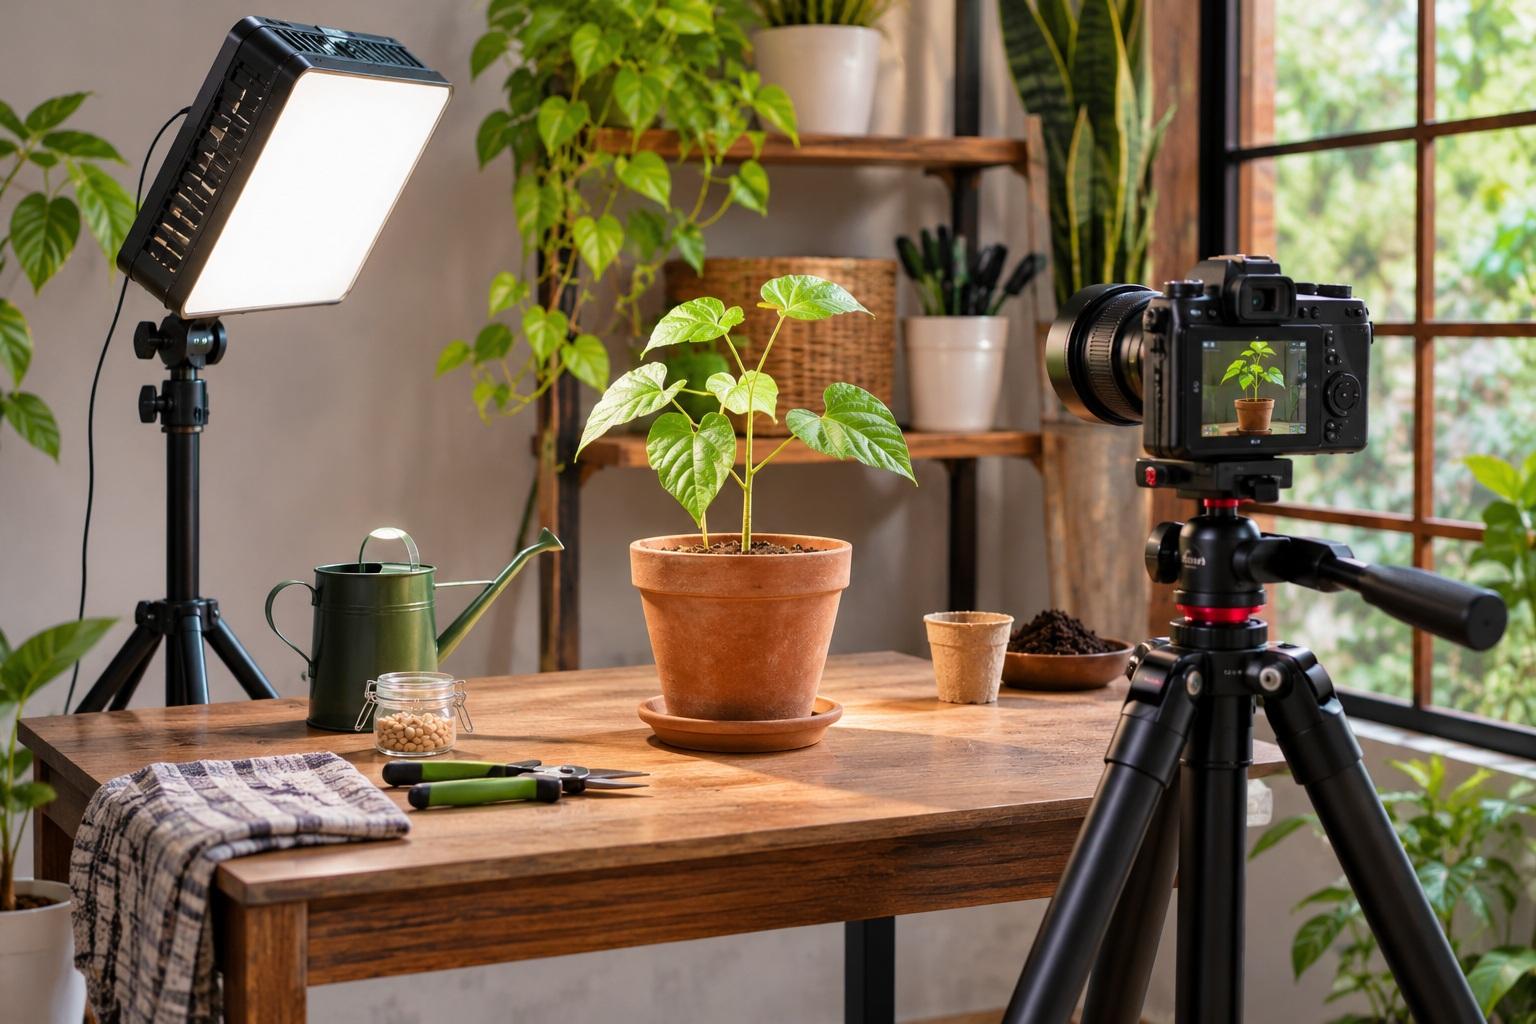
Watching a tiny seed develop into a healthy plant is fascinating, but recording the entire process requires patience and precise camera positioning.
Unlike ordinary video recording, plant growth time-lapse photography captures images at regular intervals over several days or weeks. These photographs are then combined into a short video showing changes that are normally too slow to notice.
For gardening enthusiasts, students, science educators, and content creators in Pakistan, a stable tripod stand is one of the most important parts of this setup.
Even slight camera movement can make the final video appear shaky or inconsistent.
This guide explains how to position a tripod, choose suitable shooting intervals, manage lighting, and record plant growth using a smartphone or digital camera.
A long-term plant time-lapse setup does not necessarily require professional filmmaking equipment.
However, the camera must remain stable throughout the recording period.
|
Equipment |
Main Purpose |
|
Stable tripod stand |
Maintain identical framing |
|
Smartphone or camera |
Capture individual photographs |
|
Intervalometer or time-lapse app |
Schedule photographs automatically |
|
Phone holder or camera mount |
Secure the recording device |
|
Consistent lighting |
Reduce exposure changes |
|
Reliable power supply |
Support extended recording |
|
Memory card or storage |
Save hundreds of photographs |
|
Plain background |
Keep attention on plant growth |
Choose equipment according to your camera, available space, and recording duration.
The success of plant growth time-lapse photography depends heavily on maintaining the same camera position.
Choose a firm floor or table that does not move during everyday activities.
Avoid unstable furniture, flexible shelves, and locations where someone might accidentally knock the tripod.
Spread the legs fully and secure every locking mechanism.
For longer projects, a dedicated tripod is more reliable than equipment you regularly move for other recordings.
For seedlings growing upward, place the camera at approximately the height of the pot or emerging stem.
A side-angle view makes it easier to observe the plant becoming taller, developing leaves, and changing direction.
An overhead angle may be useful for seed germination experiments or monitoring leaf arrangements.
Select the angle according to the growth process you want to demonstrate.
One common mistake is framing the plant too tightly.
A small seedling may eventually become several times taller than its starting height.
Leave sufficient space above and around the plant.
Avoid changing the tripod height midway through recording unless you are deliberately creating separate sequences.
Use removable tape to mark the tripod legs and flowerpot location.
These markers help restore the original composition if equipment must be temporarily moved.
For the smoothest result, avoid moving either the tripod or plant throughout the project.
The ideal tripod should provide reliable locking, secure mounting, and enough adjustment to frame a growing plant.
A floor tripod is useful for plants positioned on tables, balconies, and indoor gardening shelves.
The Ulanzi MT-78 Tripod is an adjustable support available through Delenzo Mart.
Its flexible height adjustment makes it suitable for positioning a compatible recording device at different plant levels.
Confirm the mounting requirements and rated capacity before attaching your equipment.
A compact desktop tripod can work well for germinating seeds, small succulents, and miniature gardening projects.
However, the desk must remain stable throughout recording.
Avoid placing the tripod on the same surface where you frequently water, rearrange, or handle the plant.
A horizontal tripod helps capture top-down views of seedlings and leaves.
For example, the Ulanzi TT59 Horizontal Tripod provides an adjustable horizontal centre column for suitable camera setups.
When extending a camera overhead, verify the load rating, secure the tripod head, and maintain proper balance.
When comparing tripod price in Pakistan, prioritise long-term stability and mounting compatibility over maximum height or portability.
The interval determines how frequently your camera captures an image.
Plants grow at different rates, so one interval does not suit every subject.
|
Plant Activity |
Suggested Starting Interval |
|
Seed germination |
Every 15–30 minutes |
|
Young seedling growth |
Every 15–30 minutes |
|
Flower opening |
Every 1–5 minutes |
|
Leaves changing position |
Every 10–30 minutes |
|
Slow garden development |
Daily photographs |
These are practical starting points, not fixed rules.
Faster movement requires shorter intervals, while slower changes can be captured less frequently.
Suppose you capture one photograph every 15 minutes for 12 hours each day.
You would record:
48 photographs per day
336 photographs over seven days
Approximately 14 seconds of footage at 24 frames per second
This produces a manageable video showing several days of growth.
Capturing throughout the night would produce additional photographs, but you must also plan how to handle darkness and changing light.
Long-duration time-lapse photography benefits from consistent settings.
Continuous autofocus may shift between the plant, soil, pot, and background.
Set focus on the main growing area and review the result as the plant develops.
For smartphones, use focus locking when supported.
Automatic exposure can make consecutive photographs alternate between bright and dark.
For controlled indoor lighting, fixed exposure settings can produce a smoother sequence.
If lighting changes significantly, a fixed exposure may produce dark or overexposed images. Control the lighting or plan the capture schedule accordingly.
Automatic white balance can change the apparent colour of leaves between photographs.
Use a fixed suitable setting when your camera supports it.
JPEG photographs are practical for beginner projects because they require less storage than large RAW files.
RAW images provide greater editing flexibility when using compatible cameras and software.
Select a format that matches your storage capacity and editing workflow.
Changing light is one of the biggest challenges when recording a plant for several days.
Indirect daylight is suitable for simple home gardening projects.
However, sunlight changes with weather conditions and time of day.
For slower projects, capturing photographs at approximately the same time each day can reduce visible differences.
A diffused LED panel can help maintain predictable exposure during scheduled photographs.
A compact light such as the Ulanzi K20RGB may be useful for illuminating small indoor subjects.
Remember that a photography light is not automatically suitable as a plant grow light.
Plants require appropriate growing conditions and light-dark cycles. Avoid leaving photography lighting on continuously simply to maintain video brightness.
Inconsistent exposure and artificial lighting can create visible brightness changes between frames.
Use stable lighting, suitable camera settings, and a repeatable shooting schedule.
For advanced projects, editing software with deflicker tools may help reduce minor variations.
Smartphones can be suitable for beginner plant growth experiments.
Mount your smartphone securely on a tripod.
Select landscape or portrait orientation according to your intended platform.
Frame the plant with space for future growth.
Use a compatible interval-shooting app if the built-in time-lapse mode cannot support your required schedule.
Lock focus and exposure where possible.
Arrange a reliable charging setup.
Capture a short test sequence before starting the full project.
Some smartphone time-lapse modes are designed for shorter recordings and may not support multi-day capture.
Confirm the app's interval controls, background operation, storage behaviour, and power requirements before committing to a long project.
Long-term recording requires more planning than an ordinary photography session.
Camera batteries may not last through several days of interval shooting.
Use manufacturer-approved continuous power or a compatible power solution where available.
Keep cables organised, ventilate charging devices properly, and protect all electrical connections from water.
Calculate how many photographs you expect to capture.
For example, 1,000 images averaging 5 MB each require approximately 5 GB before allowing additional space for backups and editing.
Keep the tripod away from frequent foot traffic, pets, children, water spills, and direct heat.
For outdoor projects, use properly weather-resistant equipment and suitable protection.
Do not assume an ordinary indoor tripod or smartphone can safely remain exposed to rain.
Once you finish recording, organise your photographs into the correct sequence.
Import them into compatible time-lapse or video-editing software.
Check for photographs captured with incorrect focus, accidental camera movement, or severe exposure problems.
Arrange the images chronologically and choose a suitable playback frame rate.
For Instagram Reels and YouTube Shorts, prepare a vertical version if your original framing supports it.
You can also add simple labels showing the recording day, plant type, or stage of growth.
Avoid editing colours so heavily that the plant's appearance becomes misleading.
Even small movements can create visible jumps in the final video.
Keep camera and plant positions consistent.
Leave enough room for leaves, stems, and future growth.
An interval that is too long may miss interesting movements. An unnecessarily short interval creates excessive files.
Uncontrolled daylight and automatic settings may introduce distracting flicker.
The plant still needs appropriate watering, temperature, ventilation, and growing light.
Do not sacrifice healthy growing conditions for the video.
Recording long plant growth time-lapse videos requires patience, consistent camera settings, and a stable tripod.
For Pakistani gardening enthusiasts, students, and content creators, a smartphone or digital camera supported by a properly positioned tripod can document germination, leaf development, and other natural changes.
Start with a stable side-angle composition, choose intervals based on plant movement, and plan lighting, power, and storage before recording.
With a repeatable setup and careful monitoring, you can turn several days of plant growth into an engaging educational video.
A stable tripod with secure locking mechanisms and adjustable height is suitable. Choose a desktop or floor tripod according to plant size, camera weight, and available recording space.
For seedlings, taking a photograph every 15–30 minutes is a useful starting point. Flower opening may require shorter intervals, while slow garden changes can be recorded daily.
Yes. Use a stable smartphone tripod and a compatible time-lapse or interval-shooting application. Check power, storage, and app limitations before starting a multi-day recording.
Place the tripod on a solid surface, secure all locks, mark the leg positions, and avoid touching the camera. Keep the setup away from vibrations and frequent activity.
Use consistent lighting, suitable manual exposure and white-balance settings, and repeatable capture intervals. Avoid unnecessary lighting changes and correct minor exposure variations during editing when needed.